VPN Server
Completing my first project gave me the confidence to do this project. I liked the idea of sitting anywhere in the world with my laptop and still able to connect with my network to securely access the internet. Hence, the VPN!
Like my first project, I have built a Raspberry Pi with a Raspian OS. Then I installed PiVPN, which is a VPN package designed for Raspberry Pi. The installation was very simple and straightforward. After installation, I configured a port number and a VPN protocol of my choice for the server. I chose the OpenVPN protocol that uses SSL VPN as its tunneling protocol. OpenVPN is compatible across operating systems, processor architectures, firewall and NAT operations. The default port number of OpenVPN is 1194 but I chose a random port number and opened that particular port in my router to enable VPN access. In the middle of configuring the VPN server, I chose a dynamic DNS (DDNS) provider and registered a hostname (eg: welcome.ddns.org) and configured it to my router’s public IP address. Then added the registered hostname in the VPN configuration. Set up a static local IP address for the VPN server, so that my IP address does not get changed dynamically by the DHCP server. In the router, then I did port forwarding that automatically directs the VPN traffic coming in the chosen port number to the IP address of my VPN. The network architecture of my VPN server setup is shown below.
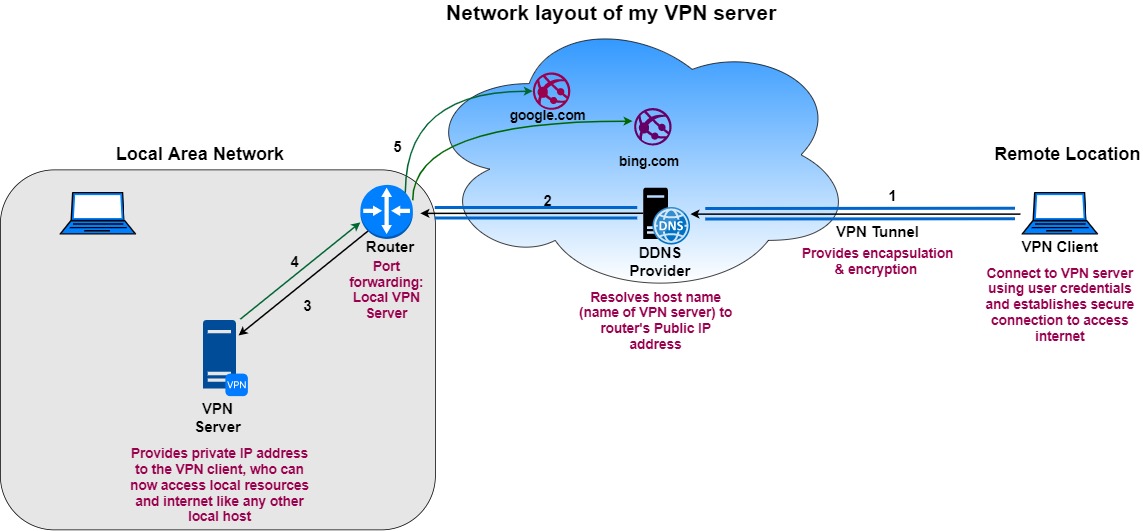
VPN provides both encapsulation and encryption of the data packets before transmitting them from a VPN client to a VPN server. In simpler terms, encapsulation means wrapping a data packet with another layer, so the contents are not visible. Encryption is changing the data from one form to another using algorithm. Only the person who holds the decryption key can unlock and decipher the data. An easy example to show the difference would be, writing a letter in a piece of paper and putting it in an envelope is “encapsulation”. Writing a letter in a coded language so that no can read is “encryption”; the letter can only be read by someone whom you shared the code is “decryption”. By default, OpenVPN uses SSL VPN to encapsulate the data. I chose ECC (Elliptic Curve Cryptography) algorithm to encrypt data because it is light-weight, uses smaller keys, faster key generation and offers security equivalent or better than some well-known algorithms such as RSA and DSA. ECC is asymmetric cryptography meaning that uses two keys (key pair), one for encryption and one for decryption. To access the VPN server, I installed the VPN client software on my laptop and other home computers. The software helps to establish a connection between the client and the VPN server. After that, I copied the encryption key from the VPN server and attached it with the VPN client. This enabled that all traffic from my laptop is encrypted and only the VPN server can decrypt it. Once the VPN client connected with the VPN server, it gets a local IP address assigned by the VPN server (see the picture below). Now, I can access the internet from anywhere as if I was sitting in my home.


The ease of use of this application is exceptional because all it takes to connect to my VPN server is just two clicks. This project was relatively easier than the other projects I did!